But there are tabs in Excel 2013 that are not included in the navigational ribbon by default, and the Developer tab is one of them. This tab contains some useful tools, such as Macros, so many people will eventually need to enable it. Fortunately this can be accomplished in just a few short steps by following our tutorial in the article below.
How to Show the Developer Tab in Excel 2013
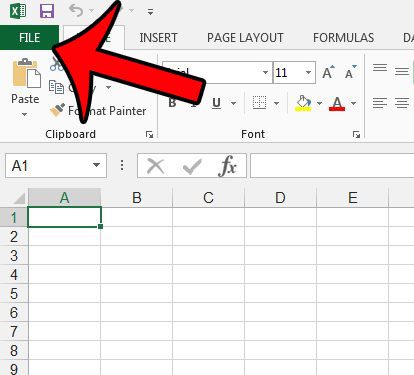
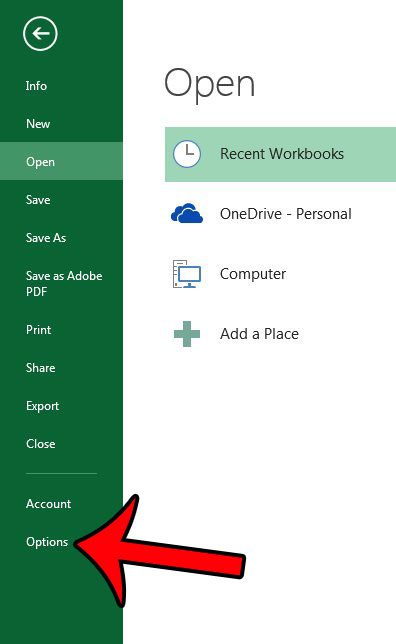
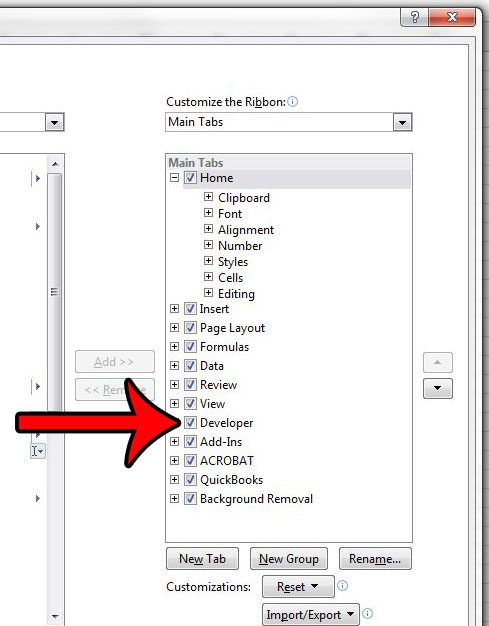
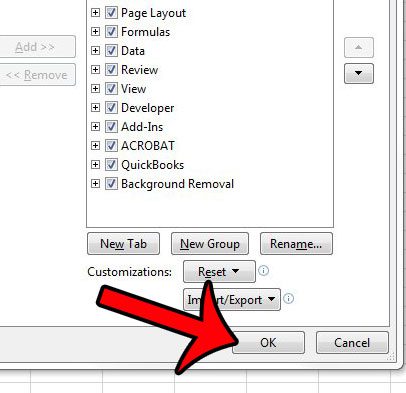
The steps in this article were written for Microsoft Excel 2013. However, the steps are similar in other versions of Microsoft Excel as well. For example, this article will show you how to enable the Developer tab in Excel 2010. Once you have customized the ribbon to display the Developer tab, it will remain there for any other files that you open in Excel 2013. Step 1: Open Microsoft Excel 2013. Step 2: Click the File tab at the top-left corner of the window. Step 3: Click Options at the bottom of the left column to open the Excel Options window. Step 4: Click the Customize Ribbon tab at the left side of the Excel Options window. Step 5: Check the box to the left of Developer under the Main Tabs column at the right side of the window. Step 6: Click the OK button at the bottom of the window to add the developer tab to the ribbon. If you decide later that you no longer wish to show the Developer tab in your ribbon, simply follow these steps again and uncheck the box to the left of the Developer tab. Do you have a header that you need to remove from a file in Excel 2013? This guide will show you how. After receiving his Bachelor’s and Master’s degrees in Computer Science he spent several years working in IT management for small businesses. However, he now works full time writing content online and creating websites. His main writing topics include iPhones, Microsoft Office, Google Apps, Android, and Photoshop, but he has also written about many other tech topics as well. Read his full bio here.


