However, the methods for performing common tasks in Chrome vs. performing those same tasks in Internet Explorer can seem a little foreign the first time you attempt them. For example, clearing your browser history in Chrome is a little different than Internet Explorer users are probably used to. This holds true for tasks that are related to tasks like deleting your browser history, such as removing the Chrome most visited sites. These are the icons that are displayed on screen when you open a new tab in Chrome. While this feature can be helpful if you frequently visit a lot of sites, it might be unwanted for your browsing habits, or you might just not want other people using your computer to see what your most visited sites are. Fortunately you can remove your Chrome most visited sites at any time by clearing your browser history.
How to Erase Google Chrome History
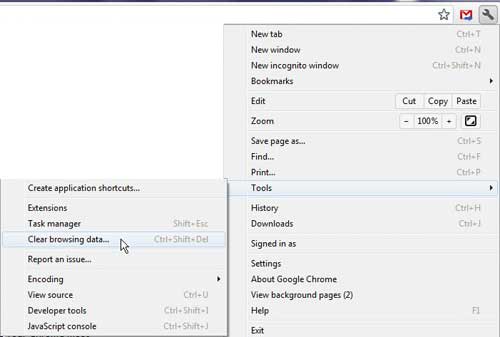
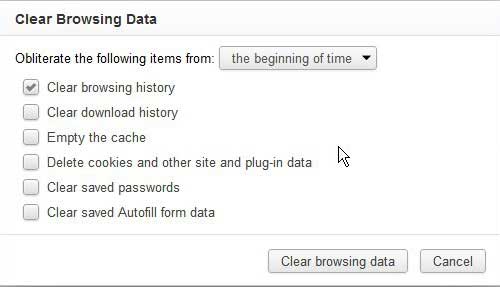
The procedure for removing your most visited sites in Chrome is actually the same procedure that answers the question how do I delete my Google Chrome History? Chrome populates your most visited list by using the history information stored within the browser, so you must clear that in order to remove the most visited Chrome sites. Begin by launching Google Chrome. Click the Wrench icon at the top-right corner of the window. Next, click Tools, then click Clear browsing data. This will open a window that looks like the image below. Check the box to the left of Clear browsing data (you can check other options, too, if you want, but it is only necessary to choose Clear browsing data to remove the Google Chrome most visited data), then click the Clear browsing data button at the bottom of the window. Your most visited sites will now be erased from Google Chrome then ext time you open a new tab.
Remove a Single Most Visited Site in Google Chrome
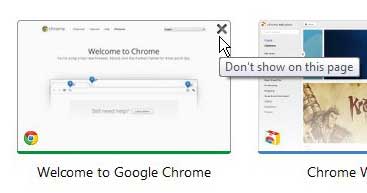
Instead of deleting all of your most visited sites in Google Chrome, you can also selectively delete displayed sites on the Most Visited screen. Open a new tab in Google Chrome to display your most visited sites, then hover over the thumbnail of the site you want to remove. This will permanently delete this site from ever appearing on your most visited page again. If you do not want to permanently delete the site from this screen, you may want to reconsider. You can get a deleted site back using the procedure further down the page, but it is a complicated process. Click the black X that displays in the top-right corner of the window to remove that site from your most visited page. If you change your mind, there is an Undo option that you can click at the top of the window right after the site is removed, but that will go away after a few seconds.
Restoring a Site That You Inadvertently Deleted From the Most Visited Screen
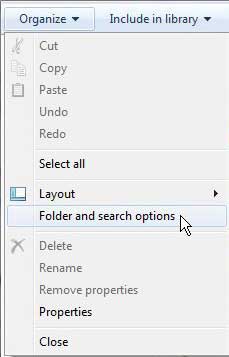
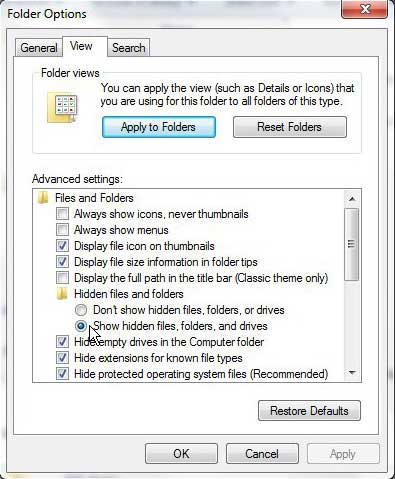
If you click the black X on a most visited site to remove it from the screen, it will actually be permanently removed form appearing on that screen, because your action has added it to a blacklist on your computer. You can restore sites that have been removed from the most visited page by following the procedure below. Before you begin, make sure that Google Chrome is not open. This procedure will not work while Chrome is open. Step 1: Click the Windows Explorer icon in the taskbar at the bottom of your Windows 7 computer screen. Step 2: Click Organize in the blue toolbar at the top of the window, then click Folder and Search Options. Step 3: Click the View tab at the top of the window, click the option to Show hidden files, folders and drives, then click the Apply button at the bottom of the window, followed by OK. Step 4: Click your C drive in the column at the left side of the window, under Computer, then double-click the Users folder. Step 5: Double-click your user name, then double-click the AppData folder. Step 6: Double-click the Local folder, double-click the Google folder, double-click the Chrome folder, then double-click the User Data folder. Step 7: Double-click the Default folder, right-click the Preferences file, choose Open, click Notepad as the program you want to use, then click OK. Step 8: Press Ctrl + F on your keyboard to open the find tool, type most_visited_blacklist into the field, then press Enter on your keyboard. Step 9: The most_visited_blacklist section should look something like this – “most_visited_blacklist”: {“2gaj4v21nn0iq7n5ru7mla374un3n79m”: null}, Step 10: Delete the middle line so that the section looks like this – “most_visited_blacklist”: {}, Step 11: Click File at the top of the window, then click Save.
See also
How to turn off hardware acceleration in Google ChromeHow to see recent downloads in Google ChromeSet Google Chrome as default browser in Windows 7How to start Google Chrome automaticallyHow to change the startup page in Google Chrome
After receiving his Bachelor’s and Master’s degrees in Computer Science he spent several years working in IT management for small businesses. However, he now works full time writing content online and creating websites. His main writing topics include iPhones, Microsoft Office, Google Apps, Android, and Photoshop, but he has also written about many other tech topics as well. Read his full bio here.
You may opt out at any time. Read our Privacy Policy