Add Password Protection to a Notebook Section in OneNote 2013
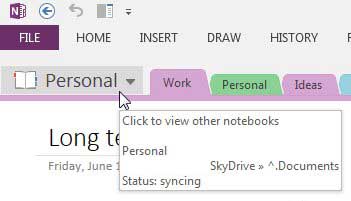
Note that this password protection will apply to your notebook section wherever you access it. So even when you open OneNote in a Web browser with your Microsoft Account password, you will still need the password for the protected notebook section to view the content. Step 1: Launch OneNote 2013. Step 2: Select your notebook from the drop-down menu at the top of the window.
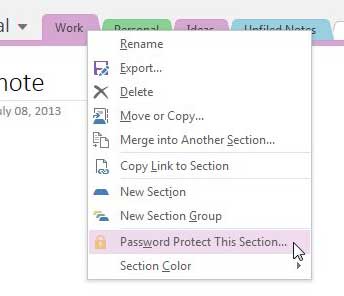
Step 3: Right-click the section tab to which you want to add password protection, then select the Password protect this section option.
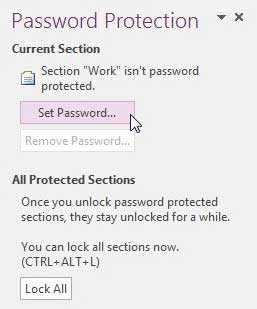
Step 4: Click the Set Password option at the right side of the window.
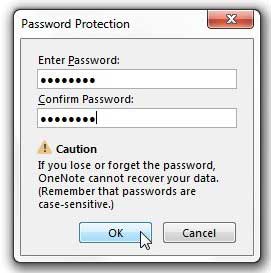
Step 5: Type your password into the Enter Password field, re-type it into the Confirm Password field, then click the OK button.
OneNote will then ask you how you want it to handle your existing backups that have a copy of the notebook section without password protection, so select the option that you prefer.
If you choose to delete the existing backups, you can always manually create a backup to ensure that the data is not lost. You can also manually lock your password-protected notebook sections at any time by pressing Ctrl + Alt + L on your keyboard. After receiving his Bachelor’s and Master’s degrees in Computer Science he spent several years working in IT management for small businesses. However, he now works full time writing content online and creating websites. His main writing topics include iPhones, Microsoft Office, Google Apps, Android, and Photoshop, but he has also written about many other tech topics as well. Read his full bio here.
You may opt out at any time. Read our Privacy Policy


