Powerpoint 2010 offers a feature called Sections which allows you to segment parts of your presentation that are related. These sections can then be moved around together, and they can be collapsed or expanded so that only the slides which you are currently editing are visible. Our tutorial below will show you how to create and rename a section to help you in organizing your slides.
Adding Sections in Powerpoint 2010
The steps in this article will show you how to select the first slide that will be included as part of a section, then insert the section name before that slide. This will allow you to collapse entire sections as once, plus provide an additional level of organization that can be helpful for larger slideshows. The steps in this guide will assume that you are adding a section to an existing slideshow. You can also add sections to new slideshows, but you will only be able to add one section before the first slide.
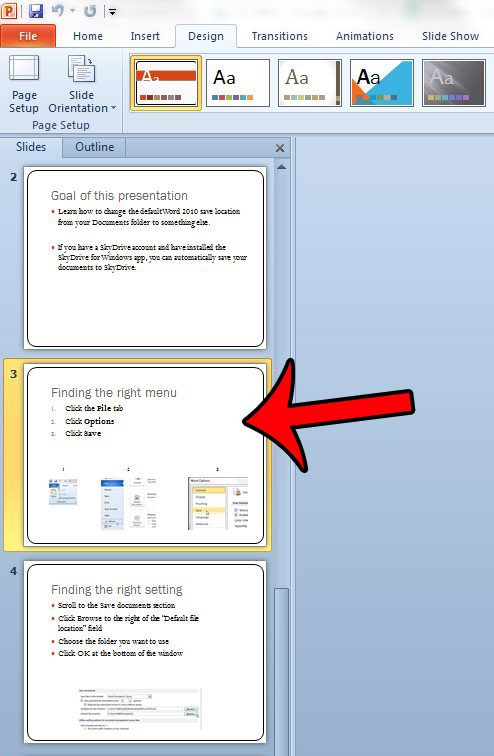
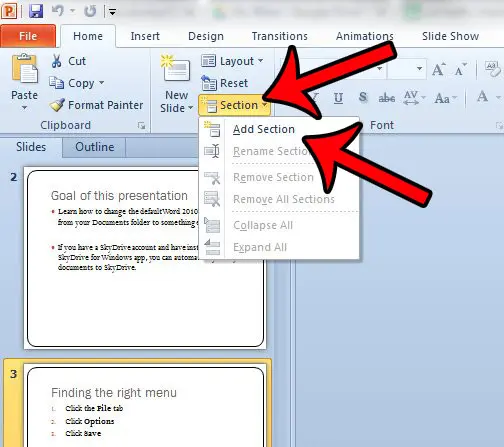
Step 1: Open your presentation in Powerpoint 2010. Step 2: Select the slide before which you wish to add the section. You can select slides from the pane at the left side of the window. Step 3: Click the Home tab at the top of the window. Step 4: Click the Section button in the Slides part of the Office ribbon, then click the Add Section button.
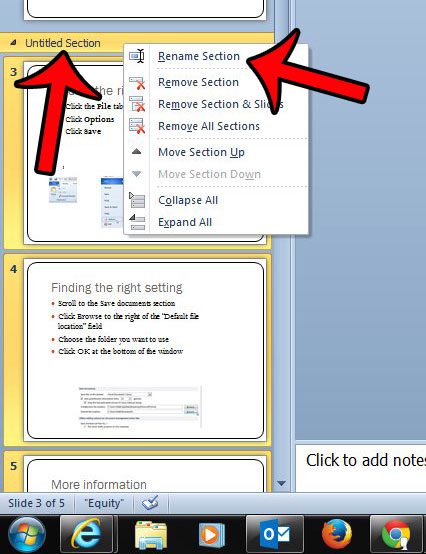
Step 5: You can rename the section by right-clicking the bar that says “Untitled Section,” then clicking the Rename Section option.
Would you like to turn your Powerpoint presentation into a video that you can upload to YouTube? Click here and learn how you can do that directly from the Powerpoint 2010 program. After receiving his Bachelor’s and Master’s degrees in Computer Science he spent several years working in IT management for small businesses. However, he now works full time writing content online and creating websites. His main writing topics include iPhones, Microsoft Office, Google Apps, Android, and Photoshop, but he has also written about many other tech topics as well. Read his full bio here.


